07 snap report
Snap a Report
To transfer report to a PC, a user must “snap” the report, which transfers it to a disk file on the mainframe. From here, it can be transferred to the user’s PC with a File Transfer Protocol (FTP) operation (described later).
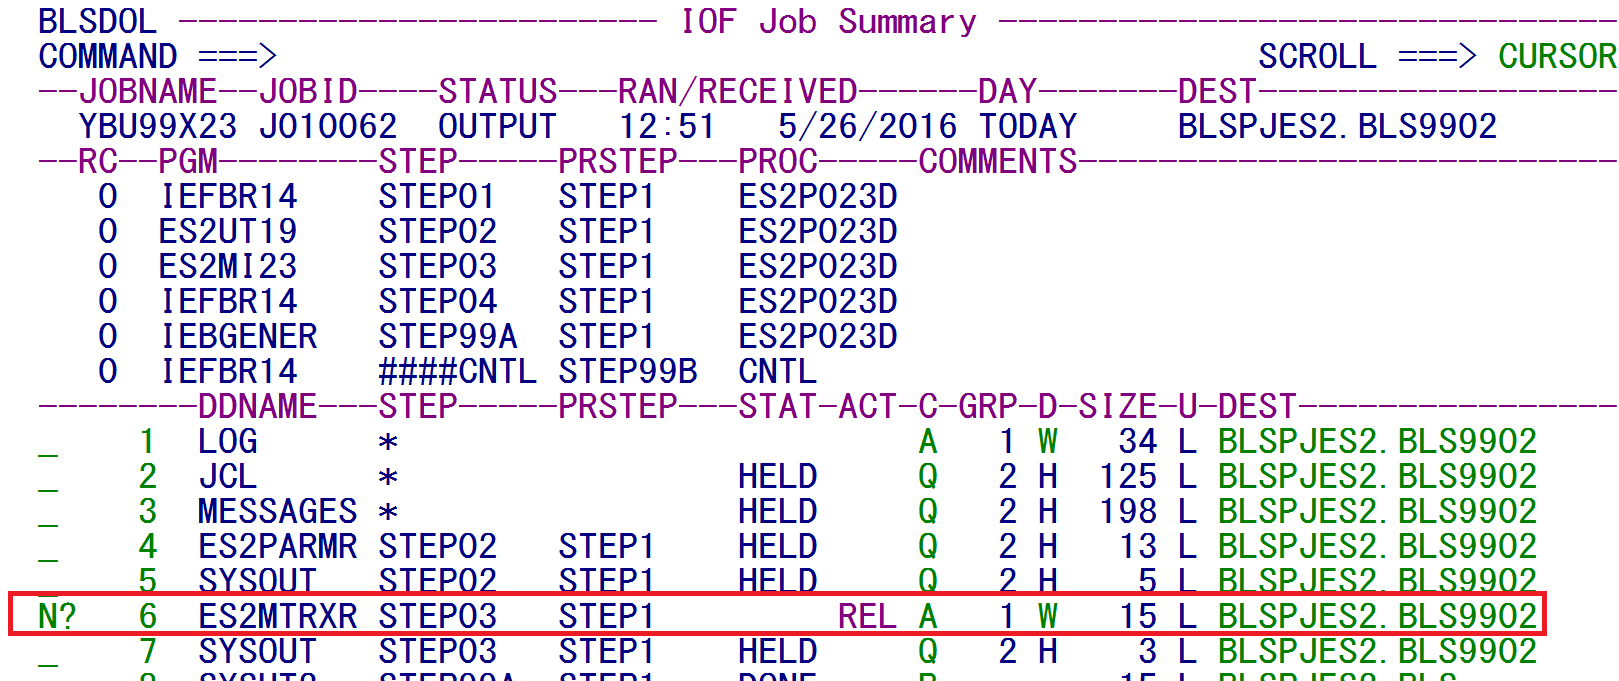
To snap the report, select it with an N? notation in the selection field of the IOF Job Summary screen, as pictured below:
This selects the report (in this case, the Matrix Report found on the ES2MTRXR line) for the “snapping” procedure. Press Enter to confirm the selection.
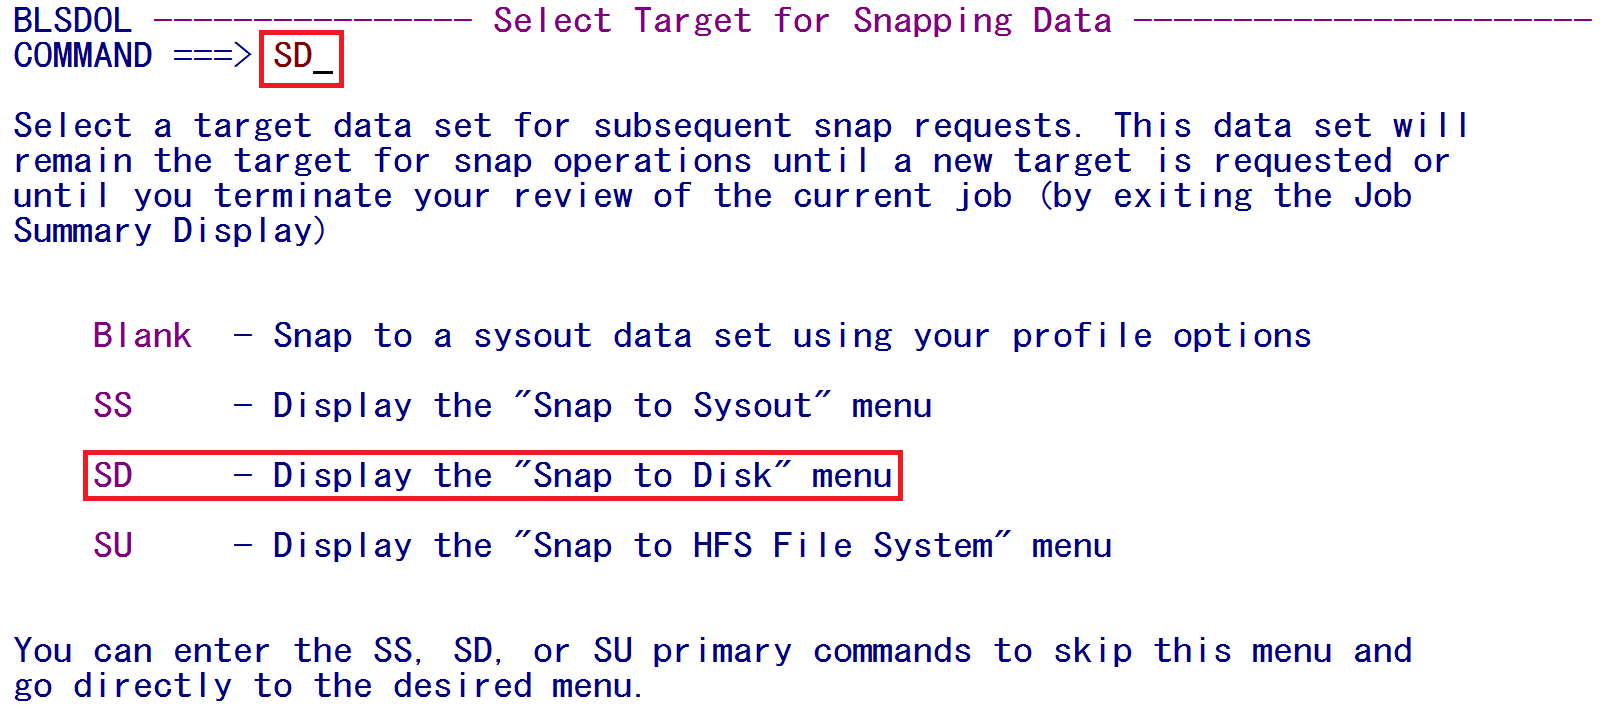
The first screen displayed in snapping a report is shown below, which is used to select the target data for snapping. Enter SD on the COMMAND line to snap the report to a disk file:
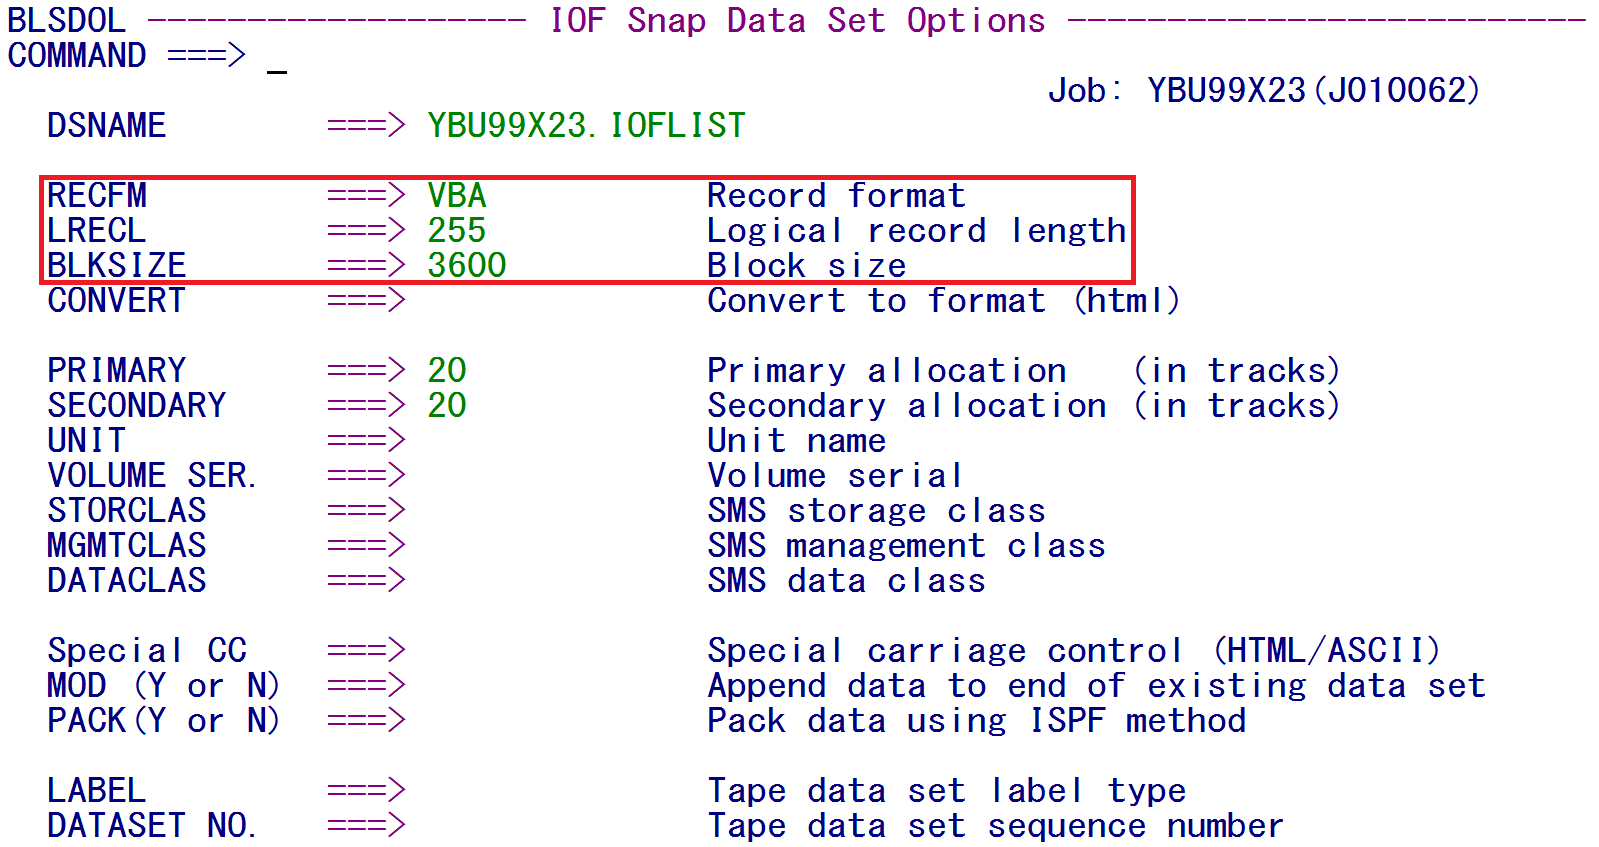
After pressing Enter, another screen will be displayed to set the parameters for the snapping data set. The default parameters use a variable blocked data format (with a VBA notation). An incorrect record length and block size (shown as the LRECL (Logical Record Length and BLKSIZE) is initially displayed. The default values are shown below:
The defaults can be changed to fill in your own data set name (DSNAME), which will always be preceded by your ID. For example, if your user ID is YBUxyz, the default file name would be YBUXYZ.YBU99X23.IOFLIST. The file name change is optional, but can help you identify the name of the snapped file on the mainframe.
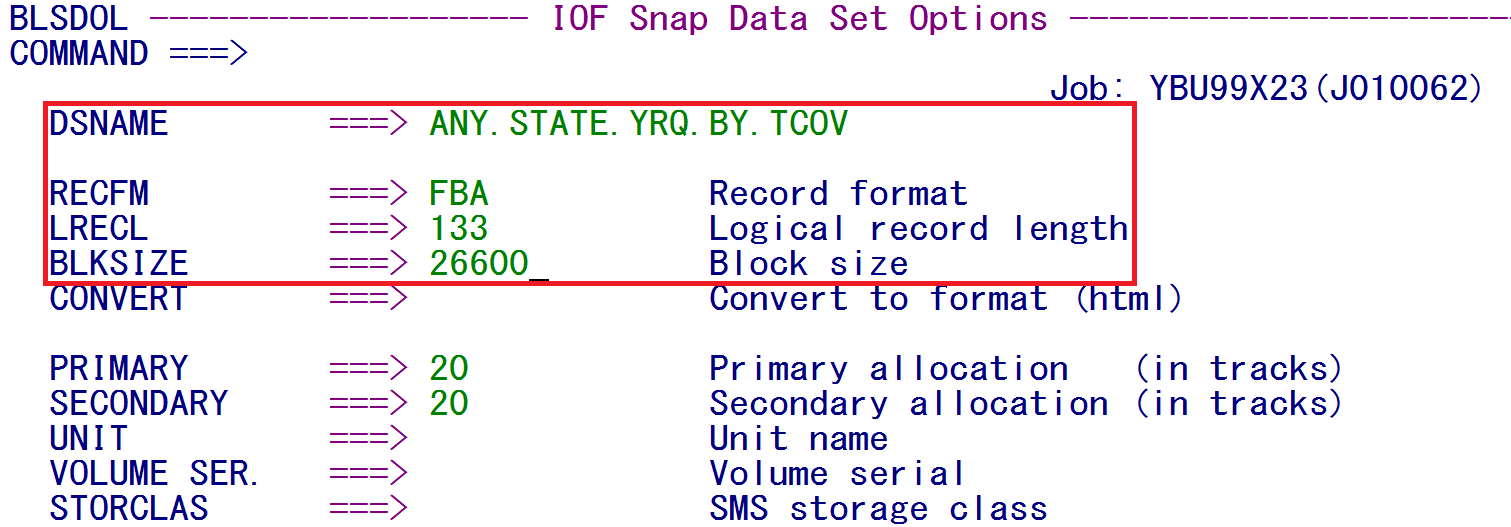
Also, change the RECFM, LRECL, and BLKSIZE to the correct values, as shown below:
Note: FBA (Fixed Block Length with Attribute) format is used because the report is a fixed-length line. The line itself is 132 characters in length, but the attribute byte (at the beginning of each line and is often invisible) controls print commands (e.g., if it has a “1”, it goes to a new page, if it has a plus sign (“+”), then the next line is overstruck, etc.). Therefore, the actual logical record length is 133 characters, and the block size should be a multiple of this, but less than 28,000. The value of 26,600 is easy to remember because it has 200 lines per block (133 × 200 = 26600) even though we could have up to 27,930 specified – 210 records per block.
The data set name ANY.STATE.YRQ.BY.TCOV is appended to the user’s ID. The user can enter any name here; however, the mainframe requires that no segment (separated by the period character “.”) be longer than eight characters and that no segment starts with anything other than an alpha character. For example, Q161 is acceptable, but 161Q would not be because it starts with a non-alphabetic character. QTRLY is acceptable as a segment name, but the full name of QUARTERLY would not be (because the length of the segment is longer than eight characters). Press Enter to confirm the parameter entries and progress to the next screen (shown below).
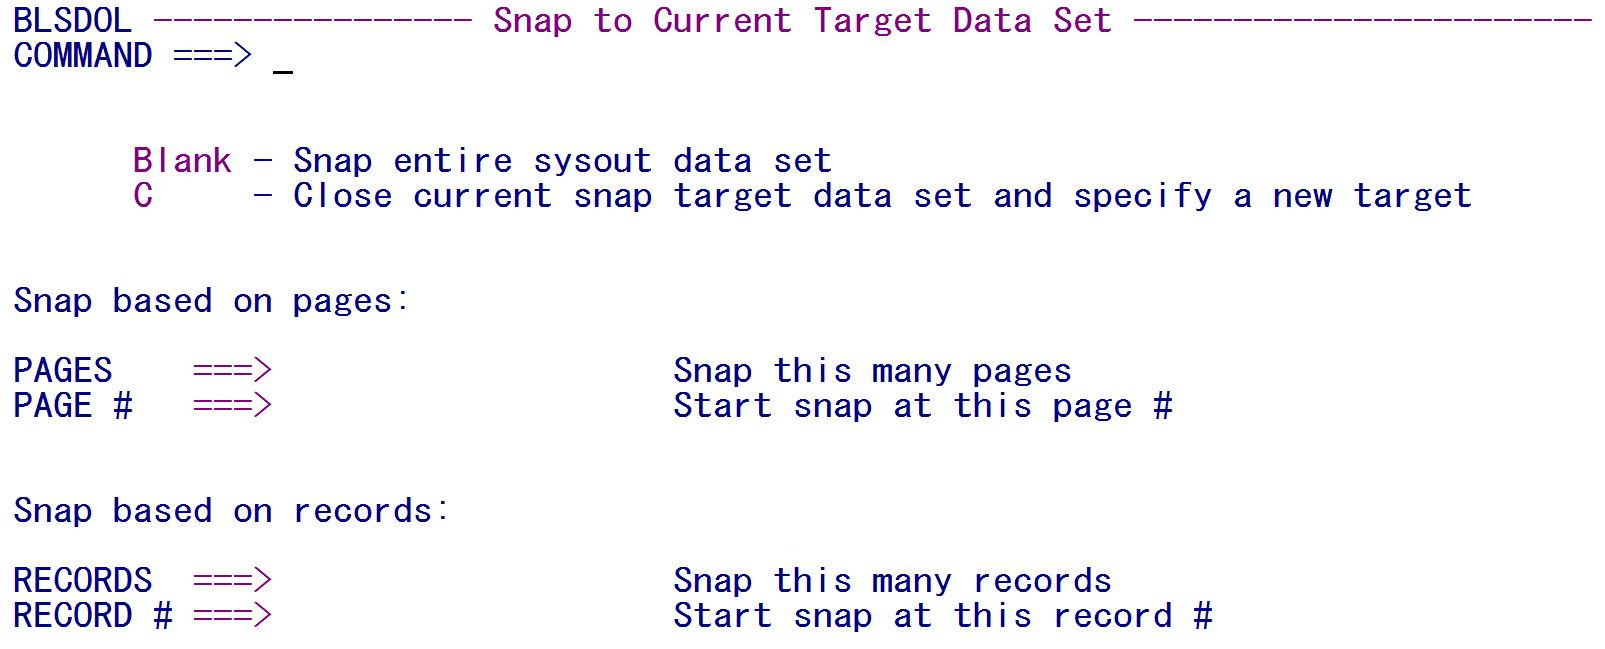
These parameters are used to optionally select portions of the file. If, for instance, you encounter a printer glitch and were only able to print the first 1910 pages of a 3000-page report and didn’t want to produce the first 1910 pages again, use the PAGE # field and specify 1911. If you only want the first 125 pages, you can use the PAGES field instead, and type in 125. Record-based parameters are also available (near the bottom of the screen) to use the same types of attributes by line numbers.
In this example case, however, we want the full report, so we simply type the Enter key to progress.
The SNP notation on the report line confirms the report has been snapped to mainframe disk file:
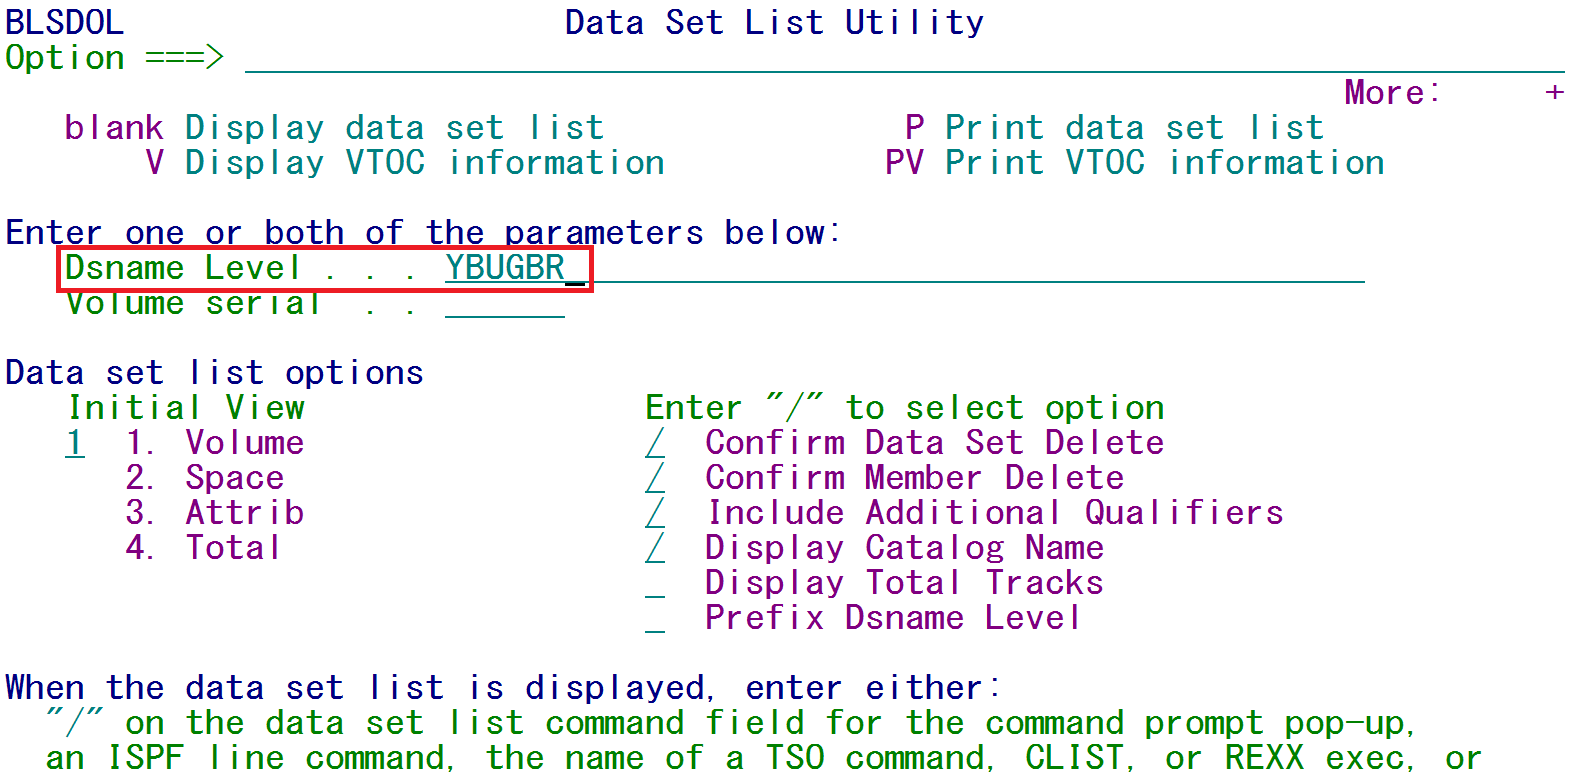
To display the file, use the Data Set List Utility to find it. This utility is accessed in TSO by typing =3.4 on the COMMAND line. To find the file on the 3.4 screen, a lead-in or “high-level qualifier” for the file should be entered on the Dataset Name Level (or Dsname Level) line (shown in the next image). In this case, we want the lead-in to display each file that starts with a particular user ID. The sample below will display all of the files listed under the YBUGBR user ID, when the Enter key is pressed.
Other fields shown on the screen above (the Initial View and the various Enter “/" to select option items) are available. The Volume Table Of Contents (VTOC) and the printing of the data set or directory provide options for displaying the data (by entering their corresponding letters on the COMMAND line). However, all items tied to the VTOC must be identified in the Volume serial field instead of the dataset name in the Dsname Level field.
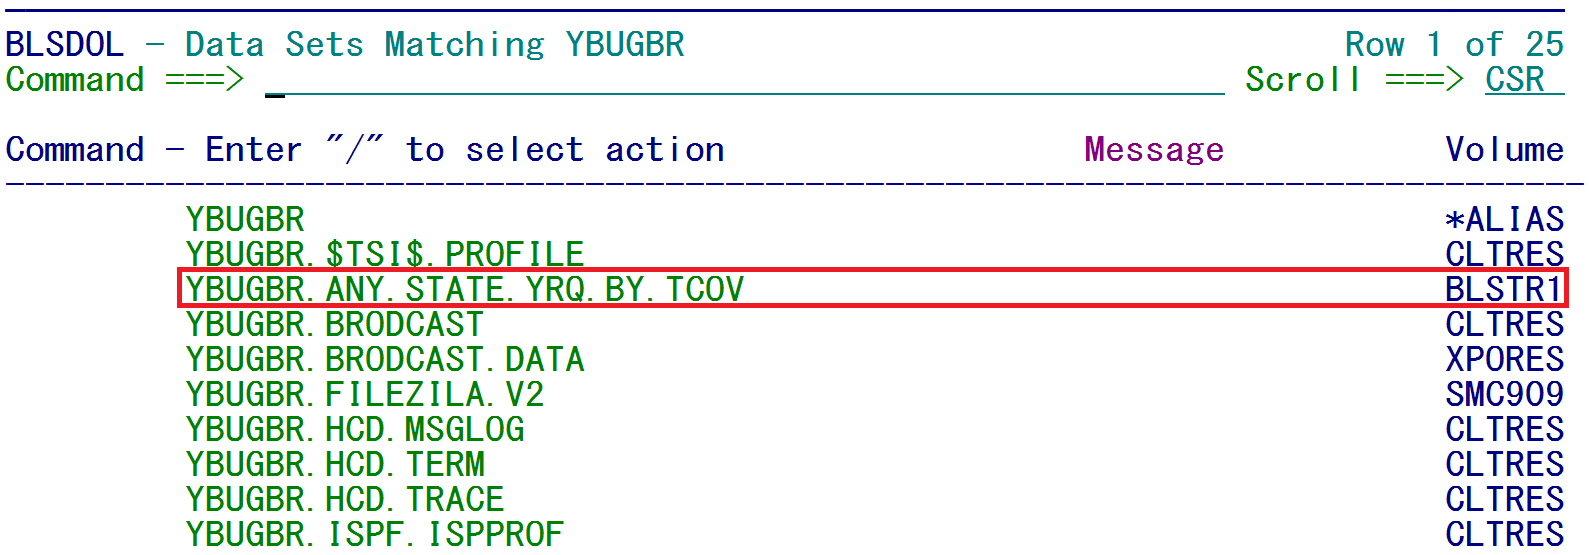
When the user ID has been entered, as shown above, and the Enter key is pressed, the following list of files is produced. The YBUGBR.ANY.STATE.YRQ.BY.TCOV file created earlier is shown here. The file’s volume (BLSTR1) is also displayed, which can be entered in Volume serial field on the previous screen.
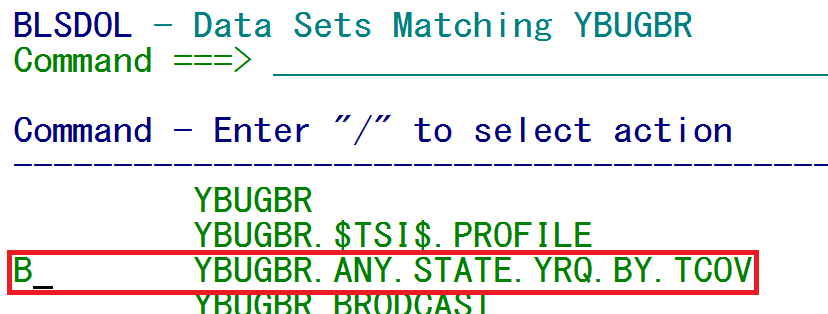
Entering a slash or diagonal (/) in front of any of these files can be used for generic selection. If we only want to browse the file, select it with a B, as shown below:
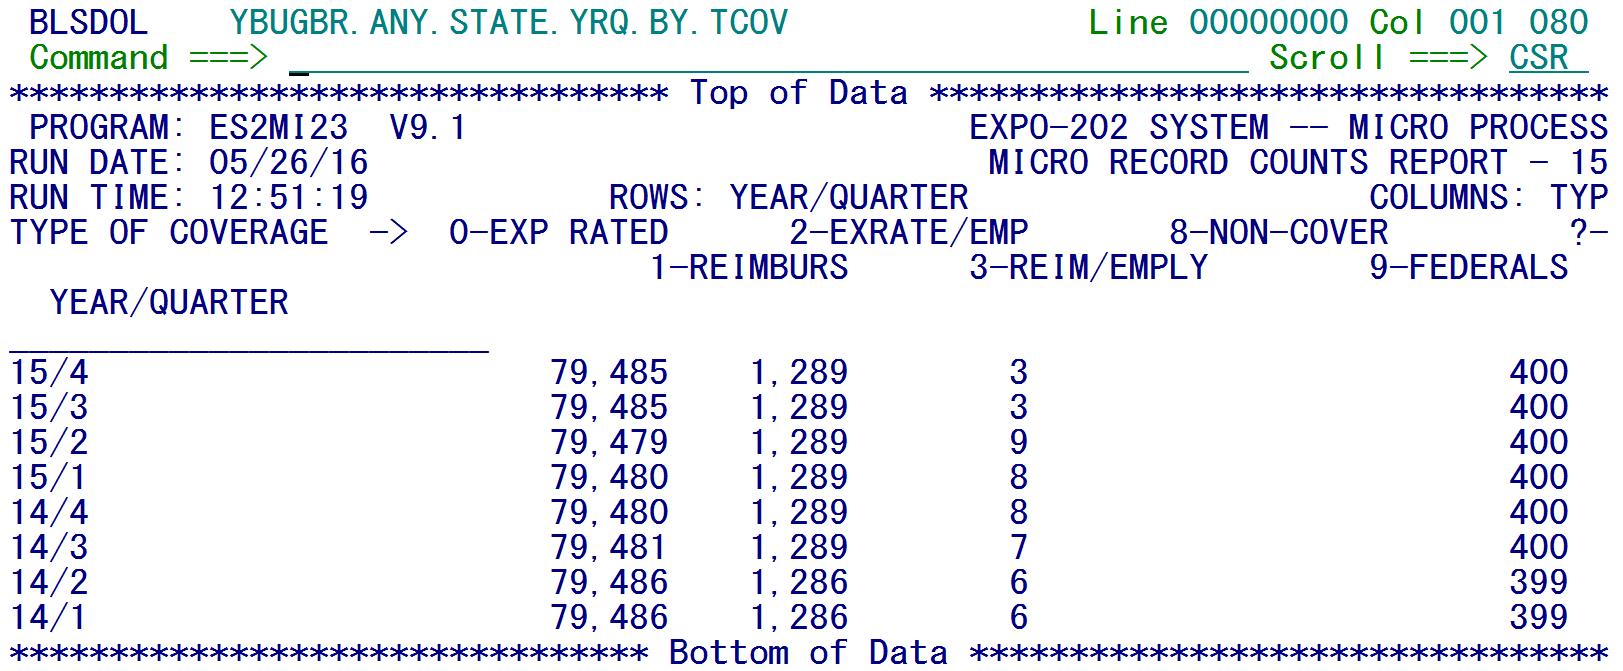
The browse results are displayed below:
In this display, the carriage control character remains invisible, but the content of the report is displayed on one screen (except the 80-column screen layout cannot display the 132 columns of the report). Use the F11 key to display data to the right, or F10 to return to the left on the line. The file data as it is displayed here can be viewed on PC after it is moved via FTP procedure, discussed later.
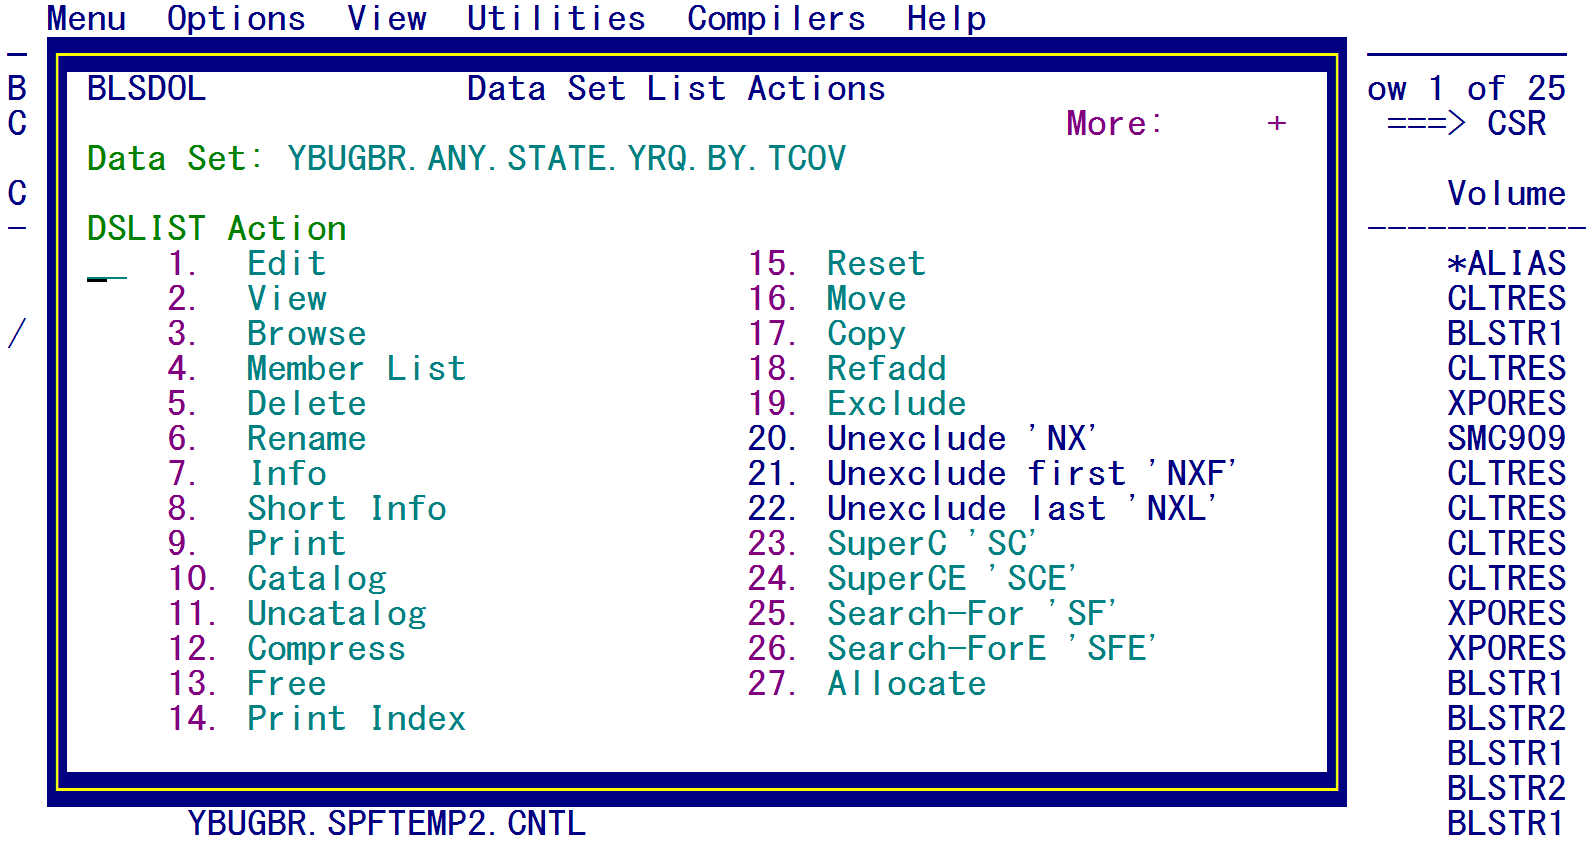
The 26 additional options available by entering the diagonal (/) on the previous screen are listed below. As you can see in the image, the diagonal has been typed in front of the file. The data set name is shown at the top of the listing and each option (with a 2-digit number in front) is displayed below. The user is encouraged to try these options out to further familiarize you with the EXPO file system.
Related Links
