07 submitting job through list
Submitting a Job through C-List
All EXPO and EARS jobs are submitted through the C-List. C-Lists are a menu-driven system to simplify batch job submissions. They utilize "panels," which are screens much like those seen in CICS. These allow job control information to be selected, such as which printer to use for the output, whether to send landscape or portrait format, what priority to use for the job, specialized parameters like a year/quarter for an output file name, etc. They replace the need to submit from a JCL. A description of the C-List procedure is provided below.
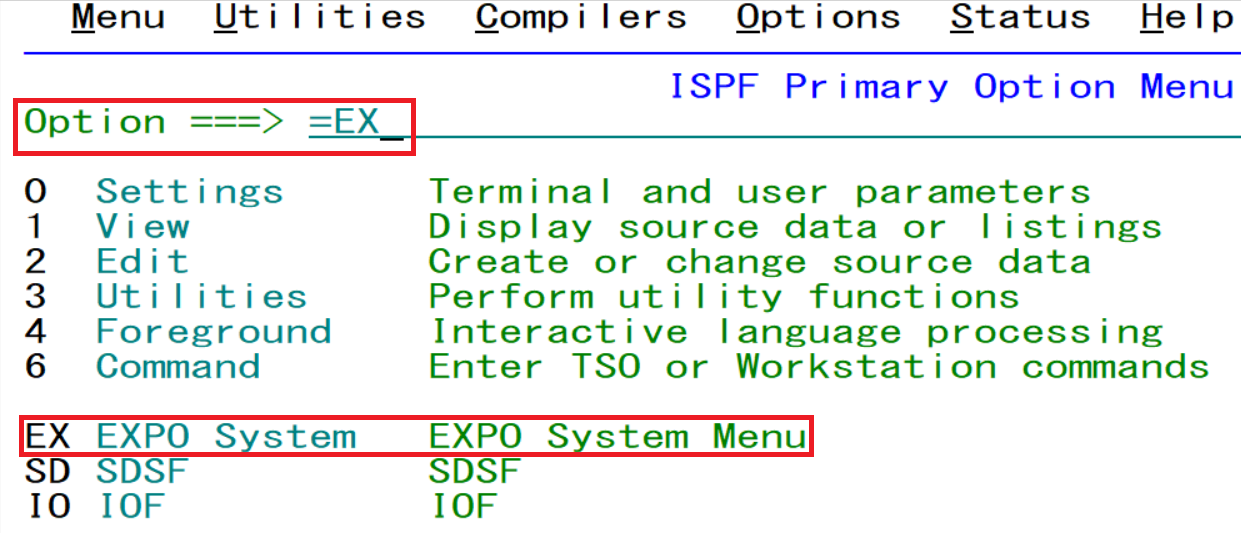
First, logon to TSO to access the ISPF Primary Option Menu. To process the C-List for job submittal, use the EX command. If you are using another program, it is recommended you precede the EX command with an equal sign (=EX, as shown below) in TSO whenever you want to submit a batch job.
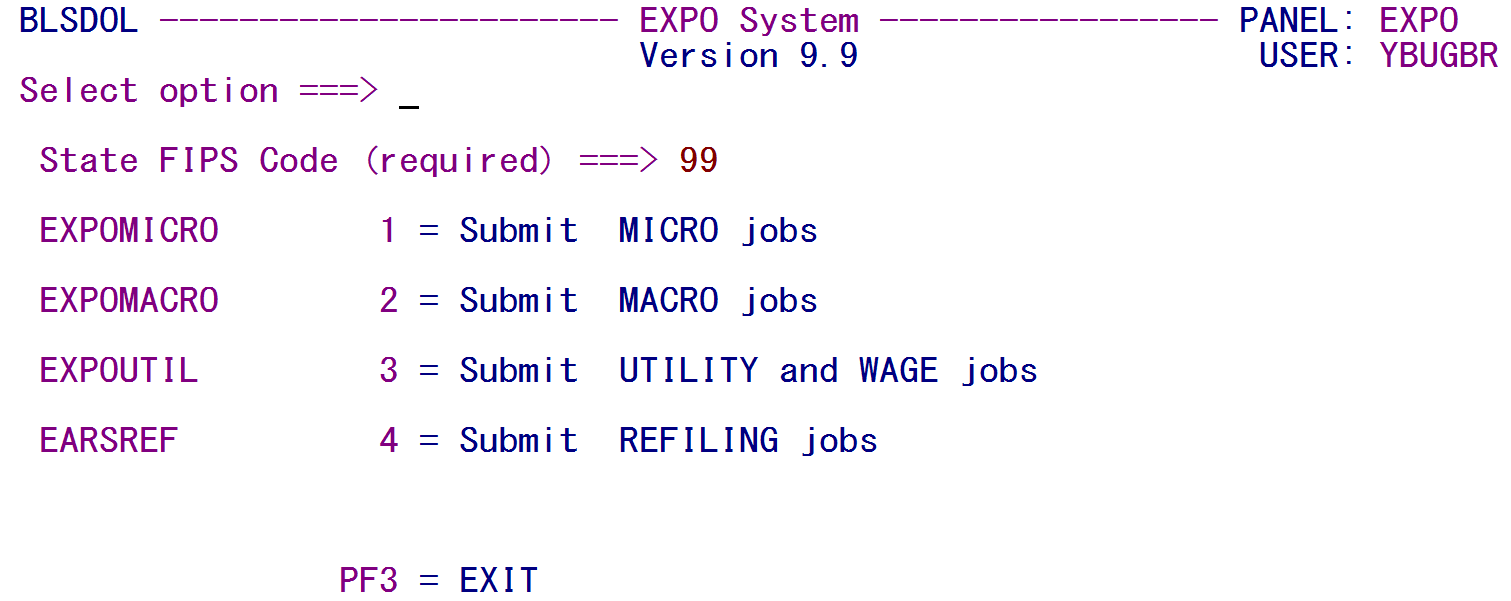
You will see a screen similar to the one shown below:
Your State FIPS Code should be assigned automatically, if your ID starts with the State FIPS after the "YBU" (like YBU04T or YBU048). If not, it will need to be entered manually (Arizona = 04, Arkansas = 05, etc.). The type of batch job you wish to run is entered on the Select option ===> line, as shown above. For micro jobs, you would type in a 1 here, for macro jobs, a 2, etc. Press Enter to confirm your selection.
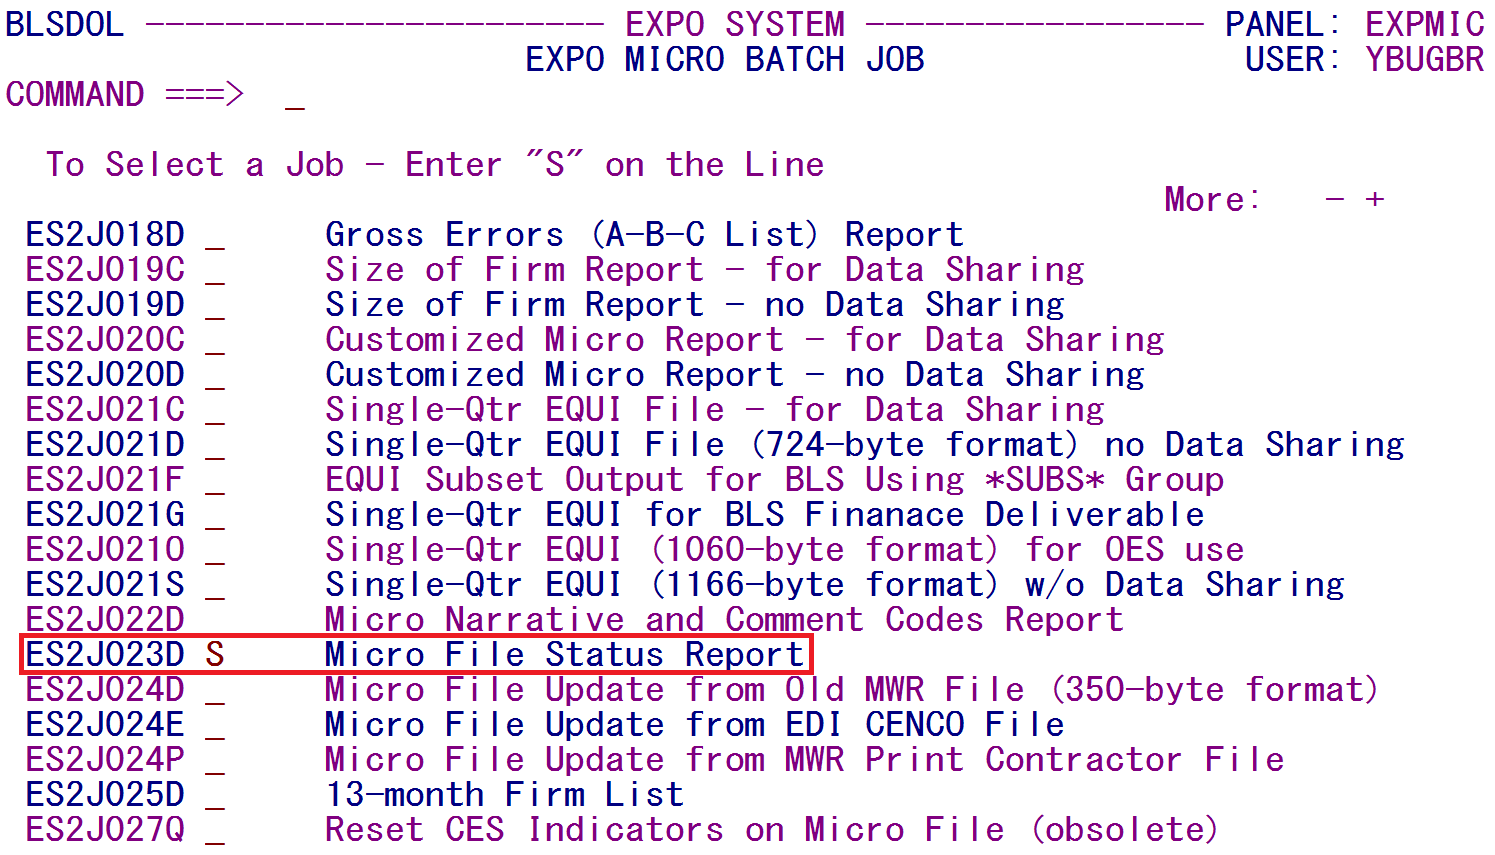
By selecting the micro jobs, a screen similar to the one below will be displayed. The F8 and F7 keys can be used to page forward and back through the list of batch jobs. Typing an S by the job to be run selects that job (in the sample shown below, Job 023D is selected for processing):
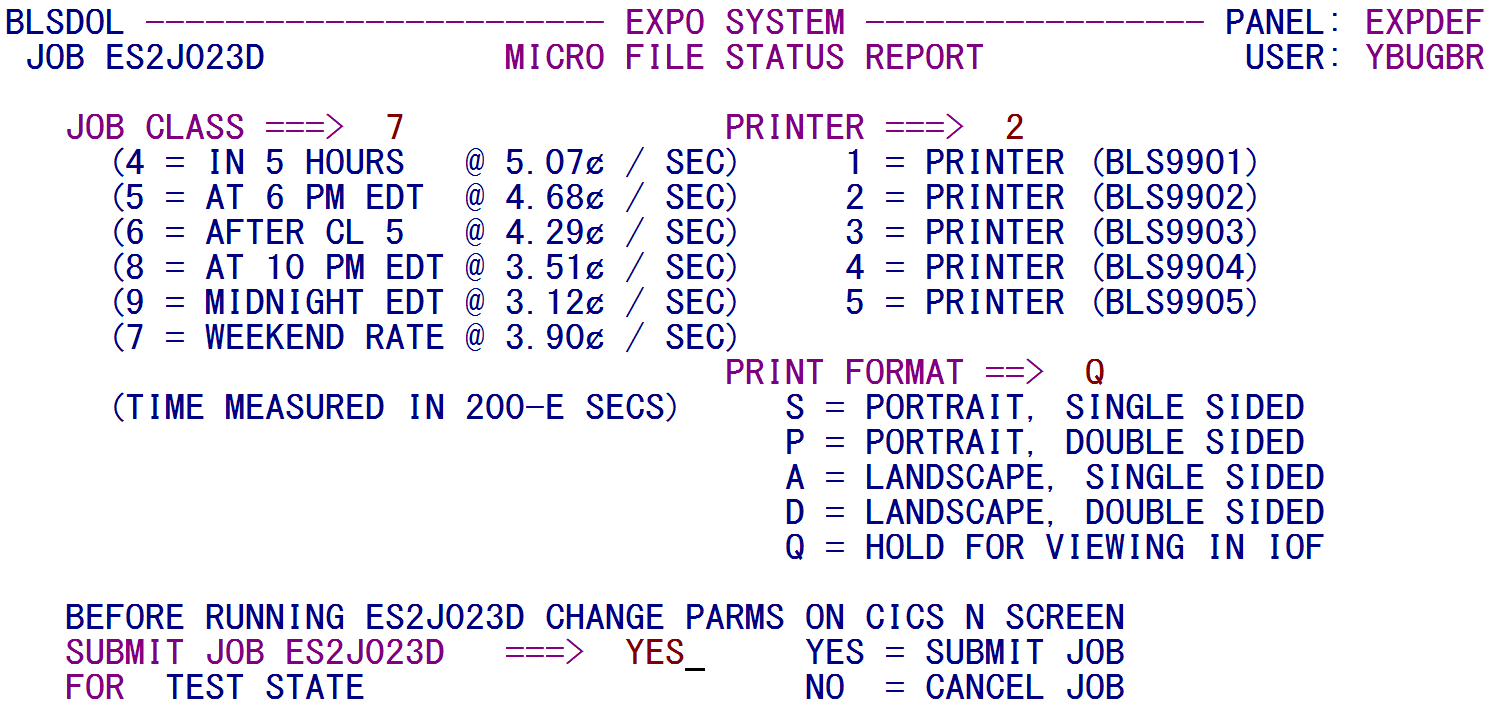
The next screen identifies the job class, the printer sequence number, the print format, and whether the job is to be submitted. Each of these items is described individually after the following image. The State’s name (the example below shows TEST STATE) is listed on the bottom line.
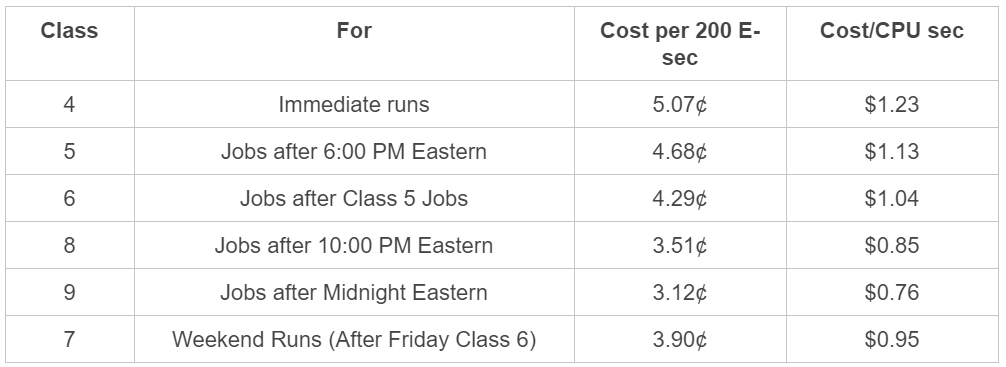
The Job Class identifies when the job should start running. Most jobs run right away, but the class codes are in place in case a heavy workload is in queue on the mainframe. There is no default job class, so these fields must be entered directly. The possible values are:
Note: When we were affiliated with SunGard, the weekend runs were the cheapest of all, costing less than the Class 8 and Class 9 night cycles. At DMA, however, this is not the case; the after-midnight runs are far cheaper than the weekend run jobs. Still, even the cost of an immediate run is cheaper than the SunGard weekend run rates.
The State Printer is identified by a numeric indicator. There can be as many as five separate printers referenced for a State. Select a printer by entering 1 through 5 on the PRINTER ====> line.
The Print Format identifies what kind of print job will be sent to the printer. This can be in either portrait or landscape. Enter a Q if no reports are to be printed (other than the job log report, which will be printed automatically on the designated printer).
Near the bottom of the screen, the user is prompted to update the parameters on the CICS ES2N screen. If the selected job requires parameters, they must be updated prior to running the job. Once the parameters have been verified, type YES on the SUBMIT JOB line to submit the job. A confirmation message will be displayed:
Once you have exited the C-List (by pressing the F3 key or by switching to another command with an = entry), you will receive another confirmation message:
Related Links
